Directors Blog on Synaesthesia -
Chrysovalantis (Valentino) Lazaridis
This blog page focuses on my involvement in the short film Synaesthesia. Namely the direction, and production as well as the relationship between the film and my specialism.
03/11/11
Producing - Valentino
Big weekend coming this week 5/11/11, Alex our inspiration for the film will be coming down to London to meet the team. Possibly we will get the sound team to record her reading the script in my basement, as well as some footage and recordings of her playing piano.
I would like to compose a music piece that will suite the film and style, either ask Alex to compose or Kylie or they could both collaborate together. Will make a decision tomorrow (5/11/11) what the team feels is the best way to get around in creating the best peace of music for the film!
Here is what came out when Alex composed her own piece of music:
Looking forward to this weekend 5/11/11 for a drawn Character turn around from Loanne Lee, some amazing sketches coming soon!
Floor plan of house coming soon, Elena Kotsoni is designing the flow from room to room, will be having a draft by the weekend 5/11/11.


Windows added

Sun added,direction of light in rooms east to west
Character Designs
So we no have 2 Character designers that designed a main character, 2 final character design sheets. Unfortunately as much as we would like to model both, we have to pick only one to model.
We also have the floor plans created by Elena Kotsoni who studies Architecture in Ravensbourne University.
09/11/11
Timing and planning production - Valentino
The team has been working very hard and I am so happy to see the project catapulting forward, it is 4 in the morning and we are close to finishing the room measurements and props.
The reference of the floor plan really helps to envision the overall placement and size of the rooms.
Here are some measurements and scales:
On Map for the 4 rooms:
8.7cm Length
5.2cm Width
In 3D for the 4 rooms:
305cm Length
217cm Width

For every 8.7cm of map LENGTH distance,
we shall multiply the number by 35 to get the 3D distance.
For example: If on the map the distance is 12cm, then the 3D distance would be 12x35= 420cm
http://forums.creativecow.net/thread/61/859277 = This website helped us find the measurement tools in Autodesk Maya so we can note the sizes of the rooms.
We are working on Dynamics now, flames coming out of the stove, trying to recreate the blue-orange ratio particles with a smooth outline and flame like shape is the next step for Amelie. Its looking very good so far! (See Tests 09/11/11 for actuall test video)
For tomorrow we need to measure the height of our ceiling and doors, I want to achieve in the final result, perfect dimensions for the environments.
Dimensions of a Standard Door info
In the U.S., the standard door size is 36 inches by 80 inches or 0.91 meter by 2.03 meters. In some areas,
the usual door size is 1.2 meters by 2.1 meters, which is widely used in comfort rooms, bedrooms as well as in main entries. The width of doors is 0.8 meters or more, depending on the purpose.
http://www.dimensionsguide.com/standard-door-dimensions/
12/11/11
References
Alex (aka. Effie) came down today to visit! So excited to finally meet the inspiration for Synaesthesia!!
I met Alex through Skype over a year ago, where my inspiration for the film first ignited, we talked about a few things then about the film so we weren't totally strangers when we met, the team hadn't met though, they introduced themselves and they really liked Alex.
We jumped straight to work!
We played sounds from the computer which would be based in the animation, i.e. door creek, footsteps, door handle, bird and train sounds etc.
She had a big A3 drawing pad to show us visually what she sees when she heard these sounds, these are the drawings:

Bids Sounds

Car Engine

Door screeking

Door Handle

Footsteps

Train Sounds
Our sound team is made up of a sound designer (Bruce Onhador) and 2 composers (Kylie Earl + Lily).
Alex was a delight to work with, she seemed just as excited by the production process as I was, to be honest I was a little nervous, but the meeting turned out just fine!
Bruce and Kylie had set up 2 microphones, one for piano and one for voice, she played piano and then we recorded a composition on piano, written by Alex herself.
The music was very nice, but the problem that we encounted was the piano, it was out of tune.
I really want to achieve a proffessional recording for the music of the film.
Here are some snapshots of the voice been recorded by the assistant producer - Alexandra August


Bed time now, its 2.05am and we have to wake up at 8am. I love animation.
Goodnight world.
16/11/11
Producing - Valentino
This past week we have been collecting everything together for out presentation for the 24th of Novemember 2011. It is very challenging for everyone to be on the same foot, As the Director I would like everyone to understand the project and take it up as if it was their own. Synaesthesia is fairly new to the world, and I see a sense of excitement on peoples faces when I discuss this condition and the project.
We have a few thing to take care of for the presentation:
1. Animatic with sound (rough track)
2. At least 2 rendered or finished shots(without animation) that clearly define the style and look of your piece.
3. Finished character designs (colour concept pieces).
4. Finished environmental designs (colour concept pieces).
For the animatic with sound this is what we have or this is what the team is currently working on:
3D artist is working on a camera fly through of all the rooms, according to the timings of each shot.
Using a time sheet, we will achieve a accurate camera fly through of every room.
The live action shoot is a very good reference for cinematographic camera angless:
Just receiving the sound of the script and the piano composition from Kylie and Bruce (Composer and sound designer) that we recorded a few days ago with Alex the main character. I will put together the sound synced with the camera fly through of the rooms.
Here is a break down of all the shots (time wise):
We are running at 25f/ps(frames per second)
1ST SHOT - Live action Intro of Girl facing house
0.00 - 0.17 (420frames)
TOTAL:17SECONDS
2ND SHOT - Hallway shot towards kitchen door TOTAL:5SECONDS
0.18 - 0.23 (270frames)
3RD SHOT - Kettle shot + Kettle to Reading room shot TOTAL:13SECONDS
0.23 -0.36 (325frames)
TOTAL:
4TH SHOT - Reading room TOTAL:23SECONDS
0.37 -0.44 (175frames-7seconds)
Camera looking at book
0.44 - 0.46 (50frames-2seconds) 225 total 9 SECONDS so far
Over head shot, zooms into book and stays
0.47 - 0.56 (225frames-9seconds) 450 frames total 18 SECONDS so far
0.57 - 0.59 (50frames-2seconds) to door
1.00 - 1.03 (75frames-3seconds) up stairs to Dog room
575frames total
23Seconds total
5TH SHOT - Dog Room
1.04 - 1.17 (325frames-13seconds) strokes dog full shot +medium
1.18 -1.21 (75frames-3second)opens door and opens next one. Medium shot pan
6TH SHOT - Piano Room
1.21 - 1.35 (350frames-14seconds) plays on piano side shot
1.36 - 1.41 (125frames-5seconds) Leaves piano. Medium shot opens door and walks up straight stairs -
cut to upstairs room
7TH SHOT - Painting Room
1.42 - 1.45 (75frames-3seconds) full shot- walks over to canvas, sits and picks up paint brush
1.46 -1.51 (125frames-5seconds) Paints. Medium over the shoulder shot.
1.52 - 1.57 (125frames-5seconds) front shot of Character taking off her glasses and colours burst out of every direction. Camera zooms into multi coloured eye.
1.58 - 2.00 (50frames - 2seconds) Camera flies through room with doors on either side with dates on them, leading us to the door at the end of the tunnel which opens by the time the camera gets to it, transitions to a white screen.
2.01 - 2.10 (100frames -9seconds) Synaesthesia scientific facts appear on white screen and followed by credits.
- Chris will start working over Christmas time on the CREDIT LIST:)
19/11/11
Producing - Valentino
We have been working on updating our animatic with only animation, to take out all the live action references and start placing the rooms with a camera fly through in its place.
Alexandra August, the co-producer on the project has possibly found the model/actor for this film. She has a good eye, and a good taste of what works and what doesn't on Synaesthesia.
Will be going up to Gloucester to visit and see her tomorrow. Hope she is the one...
20/11/11
Producing - Valentino
Francesca was amazing! She fits the film very well, I have a good feeling that Fran would be the main model/actor of Synaesthesia.
Here are some turn around pictures I took of her:
Here are the Character Turn arounds sketched and ordered:


28/12/11
Music - Lilly
The project seemed to attracted a sound composer (Lilly) and she has send me a example of her work, which I really enjoyed:
She asked if she can create a piece of music on what she visions the piano scene to sound like, this project has a lot of creative freedom and im glad to have such a wonderful team working on the project.
First Draft
05/01/12
Music - Lilly Neubauer
Lily has returned with 2 themes of music:
I really enjoyed the second piece for the reason being that it seems to flow with the camera movement and fits in the scene smoothly. The melody is catchy and not at all distracting. Making a close to finish piano piece.
Second draft
Third draft
What I feel is missing from the music so far are other instruments accompanying the melody. The emptiness requires filling as well as sound effects of doors opening, foot steps etc.
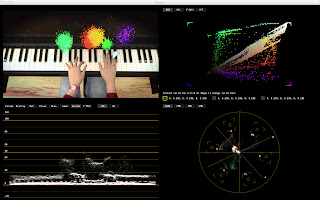
Heres the Music animated on piano for the 5th Shot - Piano Scene by James Waters:
14/01/12
Modelling - Jure Bralic
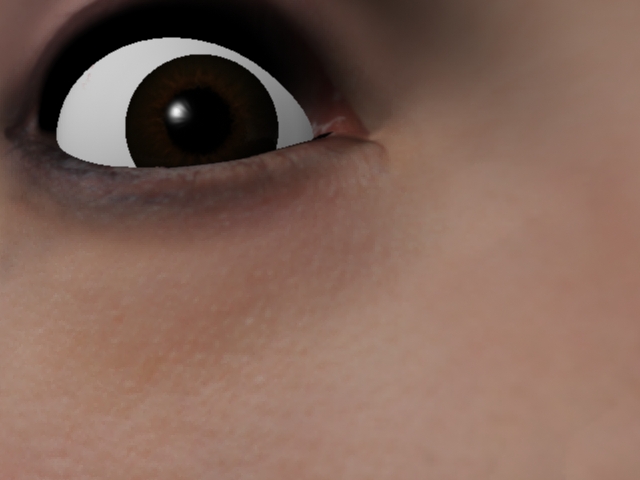
Main Character so far, head:


Modelling - Jure Bralic
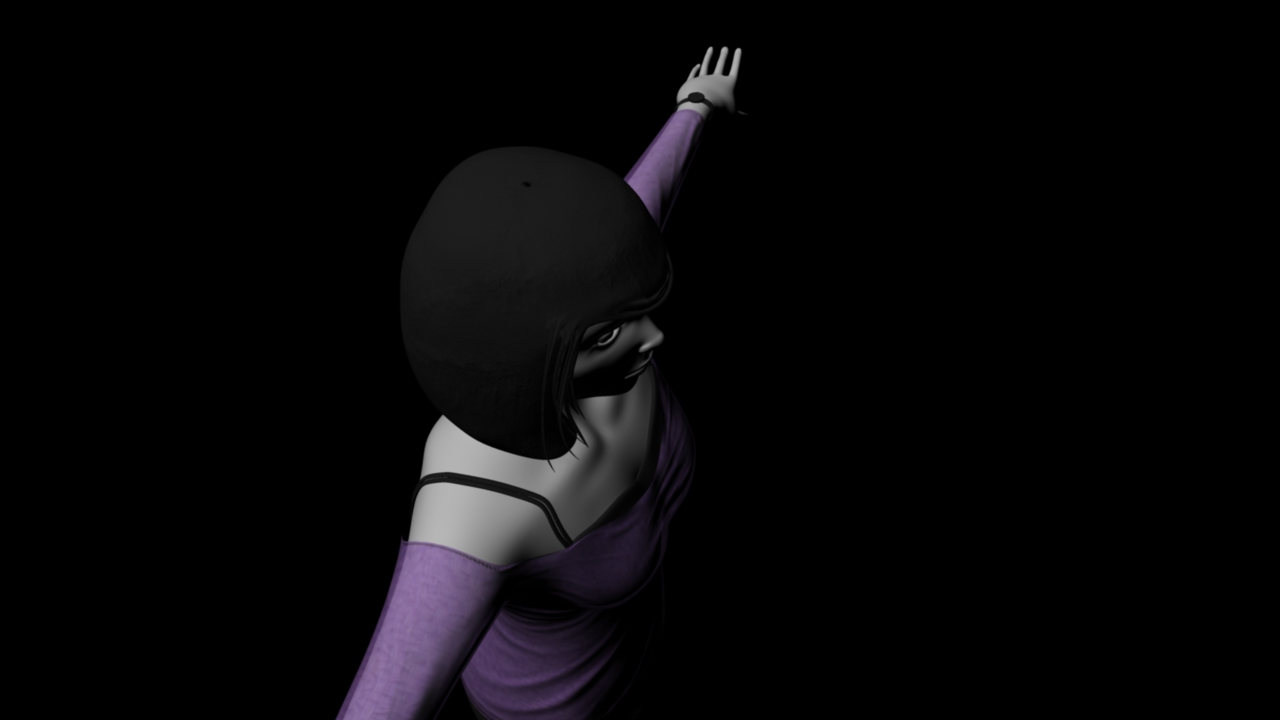
Finally our main 3D Character Was created today the 15th of January 2012 by Jure Bralic.
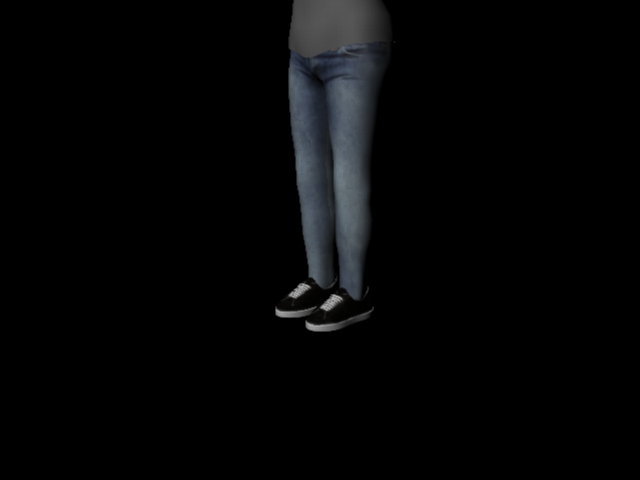
Here are some snapshots of the ALMOST FINISHED PRODUCT:


The deadline for the character to be finalised by the end of this week the 21st January, along with the Kettle and Dog model completed.
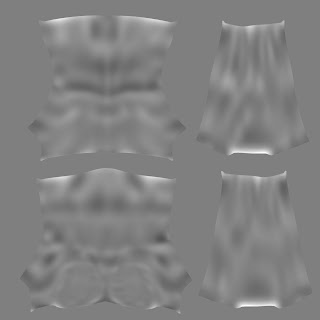
Displacement maps created in Zbrush by Jure Bralic
16/01/12
Texturing - Valentino
MARI TUTORIALS
I started learning Mari by the foundry for advanced texturing of Synaesthesia models.
Many sleepless nights ahead, a long journey ahead...
17/01/12
References + Dog Modelling - Perri Wheeler
The dog, the only other alive character in the Synaesthesia is a golden labrador.
The current model of the dog is not working too well, and it needs more work.
I would like the dog to be very similar to this one I found on the internet:


But this is what the current Dog looks like:

The model is needed not that urgently as we are in the process of setting up our pipeline and we have our main character to focus on with animation and texturing.
It is essential we receive the character finished by the end of this month.
18/01/12
TEXTURING IN MARI - Valentino
Started up Mari to Learn Projection Mapping for my Main Character.
Mari in my opinion is the industry leading tool for texturing using Projection Mapping
Avatar and Tin tin was the main creation for Mari.
I am currently a little confused on how to texture in Mari without UV maps.
Apparently there are two ways go about this process:
1.Uv maps and projection mapping
2. Ptex and projection mapping (only available on Mari v1.3 and above)
Researching Ptex here is a video by disney: PTEX Disney
But in the mean time, Im gonna experiment with the UV mapping technique.
19/01/12
MUSIC REFERENCE FOUND AND SENT TO COMPOSER - Lilly & Kylie
Brice Davoli - Love Stream
20/01/12
MARI TEST DRAFT ACCOMPLISHED
MAYA - PHOTOSHOP - MARI - Valentino
References:


Open Mari - Import:

Projection mapping directly onto model then altered textures on uv maps:


Results in Maya:


Uv Maps opened up and cleaned up:

Shirt

Hair

Eyebrows (Later Failed as the skin was not supposed to be on the eyebrows, only hair)
This is how the eyebrows were textured in Mari using a alpha brush from photoshop:

Hair (Later FAILED as the hair has a glow at the back of the head which makes the model look like there was a constant spotlight on her head. This did not obey the rules of light in the room.)
22/01/12
Ptex Painting In Mari Study - Valentino
New
Select Geometry
Force Ptex (Ignores Uvs on object) - Stores Pixels on Every polygon - Good way to keep high resolution images onto geometry.
Ptex Import Creation
Autosize:
World Space Density (Small Object - Medium sized) -
Every 1cm of object and gives us pixel space
Uniform Face Size (Will take every quad and give it its own resolution)
Chose World space Texels for example: 5
Format: Half
Checklist for Mari PTEX Painting
1. Adjust paint buffer: 16bit
4k images optional
2. Color Depth 16
3. Turn off clamp
4. View>Palletes>Color Management>Linear
5. Preferences>GPU>Texture Type from Byte to Half
6. Import and Start Painting
Set up Shortcut
Clear painting - Shift+C = Clear buffer
Shortcuts:
Different Views quicksnap using keys:
1 -Top
2 - Bottom
3 - Side
4 -..
5 -..
6 -..
Shift c- Clear Paint Buffer
B - Bake
Shift V- Projector Camera
Shift, Click and Drag
Click and move right or left:
Hold Q- Squash Brush
W -Rotate Brush
O - Opacity
E - Eraser tool
Choosing Colours:
x - Switch between two selected colours
d - Reset colours to black and white
j - Colour pop up - foreground colour
k - shelf pop
l - image manager(useful when using paint through tool)
n - Switch between last two brush tips
Paint buffer when you first paint:
Shift+Click+Drag To scale buffer up and Down
Ctrl+Click+Drag To Move up or down
Home Key - To toggle between painting Pallettes
Tools and options:
Colour Picker tool - Choose colour of paint brush
Fix lights to camera
Preferences>Misc>Default Lights fixed to camera
Edge Mask Tool (G) - Turn off colour preview mask with the comma key (,)
Paint Through tool - Pan lock and scale lock tool
Select image from image manager >Select Patch and Paste onto Uv map(Patch)
(Chose resolution if mis-match)
You can also copy and paste from patch to patch
Kinds Of Selections:
-Patch mode
-Object mode
-Face mode
Saving Selections: hide or lock if needed
Right click
Selection Groups
-Object
-Patch
-Face
Smart Selection
Be in face select mode and be in smart selection tool
3D Atributes such as facing or connectiveness
eg. set it to select up to where the geometry diverges into a certain angel
NOTES:
Mari is also good for fixing 2D Paint videos
Mari is QT based - Meaning interface is customizable
Think of Mari as you are painting on glass
Mari Bakes and clear
16bit colour painting according to pc power
Edge Masking
0.7 /0.5 Good Masking numerals
Ambient occlusion Mask
Manual
Turn on Paint through
(ptex later on failed on Synaesthesia due to the render farm and our personal work stations not having the software called renderman or vray to render ptex.)
23/01/12
Smoke Test Received from Amelie
Maya - Mari Workflow:
24/01/12
Dispacement Maps & Zbrush -Valentino
What is a Displacement Map and why is it important?
Creating Displacement Maps In Zbrush
1. Import Tool(.obj)
2. Set Model to lowest subdivision level in TOOLS>GEOMETRY
3. Adaptive on (overides DsubPix Setting
4. Smooth UV's (Reducesgrid pattern chances appearing in displacement map)
5. Create and Export Map

figure 1. shows the settings needed to create a Displacement map

figure 2. Error creating map because of highest division-level being active.
Something is not allowing me to create a displacement map as seen in figure 2
Zbrush 4 settings for displacement map.
Tests Exports of various settings of Displacement maps:


DpSubPix =4

Problem: Displacement Map applied onto all of the model
25/01/12
Hair Research in Zbrush - Valentino
A way of making hair for models in zbrush - outstanding!
If Synaesthesia could have the possibility of hair created so accurately it would boost the visual aspect greatly!
26/01/12
Moving UVs Research and Execution - Valentino
Possible Solution for suffering UV-maps to Mari layered out and not compressed on top of each other: http://www.jawa9000.com/Technical/UVs/UVs.htm

Create as many UV projections as you see fit to get the areas of detail you need. One Automatic Projection won’t be enough and a bazillion projects will be too much (unless of course you have a bazillion faces).
Immediately after creating a projection with a selected set of faces, in the UV Texture Editor (UVTE) window, you will notice that the selected faces will have a Manupilator-like tool selecting them. You can move, rotate and scale according. At this point, it is strongly recommended that you move your selection to an unused area of this the UVTE window. This will prevent overlapping UVs. Think of the UVTE window as a staging area where you can dump all your UV sets like puzzle pieces on a tabletop. These pieces will sit there until you move them into their final resting place.
Immediately after creating a projection with a selected set of faces, in the UV Texture Editor (UVTE) window, you will notice that the selected faces will have a Manupilator-like tool selecting them. You can move, rotate and scale according. At this point, it is strongly recommended that you move your selection to an unused area of this the UVTE window. This will prevent overlapping UVs. Think of the UVTE window as a staging area where you can dump all your UV sets like puzzle pieces on a tabletop. These pieces will sit there until you move them into their final resting place.
To edit UVs, right-click hold and select UV(s). Select the Move, Rotate or Scale tool to manipulate the UV’s positions within the grid. No other tool will work in this window to move UVs.
Be careful as you create new projections and move old selections around not to unintentionally stretch or pull UV sets. Stretching UVs from their original projections will cause the texture map(s) assigned to this surface to stretch and/or pull which will lead to bad looking textures.
Be careful as you create new projections and move old selections around not to unintentionally stretch or pull UV sets. Stretching UVs from their original projections will cause the texture map(s) assigned to this surface to stretch and/or pull which will lead to bad looking textures.
http://www.jawa9000.com/Technical/UVs/UVs.htm


27/01/12
End Credits Test by Chris Fry for Synaesthesia
28/01/12
Motion Capture Research - iPi
This is my blog for the first time that we tried using motion captre with 6 cameras:
Motion Capture Test
29/01/12
Force Ptex Mapping In Mari - Research
What is Ptex?
PTEX (Per-face Texturing) is a texture mapping system developed by Walt
Disney Animation Studios as an alternative to traditional methods of
texture mapping. Ptex addresses various issues associated with traditional
texture mapping by eliminating the need for artists to manually create UV
maps.
Marketing and Self reflection - Valentino
Written research and self reflection regrading the marketing your film and the efficiency of group work processes - such as drop box and regular meetings.
Team Synaesthesia have had weekly meetings, since the start of the project, as we have many people working on the film it is essential for meetings and deadlines to progress the project.
At least 4 times a week Arpit Achha the Lighting TD, Rigging Artist, Environment Modeller and I meet and work on Synaesthesia.
The rest of the Team, Amelie the Dynamics artist, Bruce, Lily and Kylie our composers/sound designers, we meet once a week with weekly Deadlines.
Communication through google calendar and emails has been a essential part of our progress,
As we are nearing the final drafts for the music and sounds of the film we are working hard to keep up with the visuals with updated animatics.
We transfer has been and will be the primary tool for transferring up-to 2gb of data online to Synaesthesia members.
Drop box has been used briefly and I am starting to introduce it to the rest of the team members as it is a new tool for them to use.
Marketing Research of Synaesthesia:
3 Tips on marketing
A 2010 podcast interview with Janis Jurkovskis director of Children of Karosta.
Its Difficult to find money
Notes:
Share on twitter and Facebook
Focus on local community
Contact relevant topic industries such as:
Discovery Channel,
National Geography
Festivals:
BAA
Bristol Encounters Festival
Sponsors such as:
State/Government
Website for hundreds of animation festivals all over the world!
http://www.animation-festivals.com/festivals/klik-amsterdam-animation-festival/
Website for hundreds of animation festivals all over the world!
http://www.animation-festivals.com/festivals/klik-amsterdam-animation-festival/
Potential Target Industries:
Medi-Mation
I have had previous opportunities to send films to festivals such as Bristol encounters festival, this would be one of the places I plan to send the film too.
As for marketing, the website has had over 1500 views.
The process that we will follow is the trailer before the release of the film to the public.
It will be ideal for our film to get seen at festivals most importantly.
The director of Synaesthesia has a meeting with a producer of a Feature film for guidance and advice on how to market and promote a film, this will be in late March,
I have contacted and confirmed that the meeting will take place.
Deadlines for Professional Skills
Research another film like ryan and the marketing and how thats doing
mirror their way
Design of our poster
Website and bussiness cards
Render 2 Shots by 16March
Hair In Maya
04/02/12
Broadcast Health and Safety
http://learn.rave.ac.uk/moodle/mod/resource/view.php?id=35623
- We have taken the following Safety Precariousness for BROADCAST HEALTH AND SAFETY:
1.1 Interlaced Footage Required:
1.3 HD Settings
High Definition Format
All material delivered for UK HD TV transmission must be:
x 1920 x 1080 pixels in an aspect ratio of 16:9
x 25 frames per second (50 fields) interlaced - now known as 1080i/25.
x colour sub-sampled at a ratio of 4:2:2
The HD format is fully specified in ITU-R BT.709-5 Part 2
1.3 Sound Quality
Sound must be recorded with appropriately placed microphones, giving minimum background noise and
without peak distortion.
The audio must be free of spurious signals such as clicks, noise, hum and any analogue distortion.
The audio must be reasonably continuous and smoothly mixed and edited.
Audio levels must be appropriate to the scene portrayed and dynamic range must not be excessive. They
must be suitable for the whole range of domestic listening situations.
Stereo audio must be appropriately balanced and free from phase differences which cause audible
cancellation in mono.
The audio must not show dynamic and/or frequency response artefacts as a result of the action of noise
1.4 Tolerance of out of gamut signals
In practice it is difficult to avoid generating signals slightly outside this range, and it is considered
reasonable to allow a small tolerance, which has been defined as follows under EBU Rec103:
x RGB components must be between -5 % and 105% (-35 and 735mV)
therefore
x Luminance (Y) must be between -1% and 103% (-7mV and 721mV)
Slight transient overshoots and undershoots may be filtered out before measuring, and an error will only
be registered where the out of gamut signals total at least 1% of picture area. Many monitoring devices
are designed to detect errors to this specification.
1.5 ‘Blanking’
HD images must fill the active picture area (1920 x 1080 pixels). No ‘blanking errors’ are permitted on new,
up-converted, or archive material.
However a two pixel tolerance will be permitted during CG or complex overlay sequences where key signals,
graphic overlays or other effects do not fully cover the background image. Where animated key signals or
overlays cause moving highlights at the edge of the active image it is preferable to blank these pixels
completely. A note of the timecodes and reasons for these errors should accompany the delivered
programme.
06/02/12
Ptex - PTEX testing in MAYA with VRAY - Valentino


08/02/12
Facial animation REFERENCE:Blur studios
10/02/12
Texturing - To Maya, from Mari - Valentino


Too glossy

Clothing & Skin:


 Base Layer colour
 Separate Layer design
Flower texture added - Alpha channel


 Freckles Added
Table Texturing:

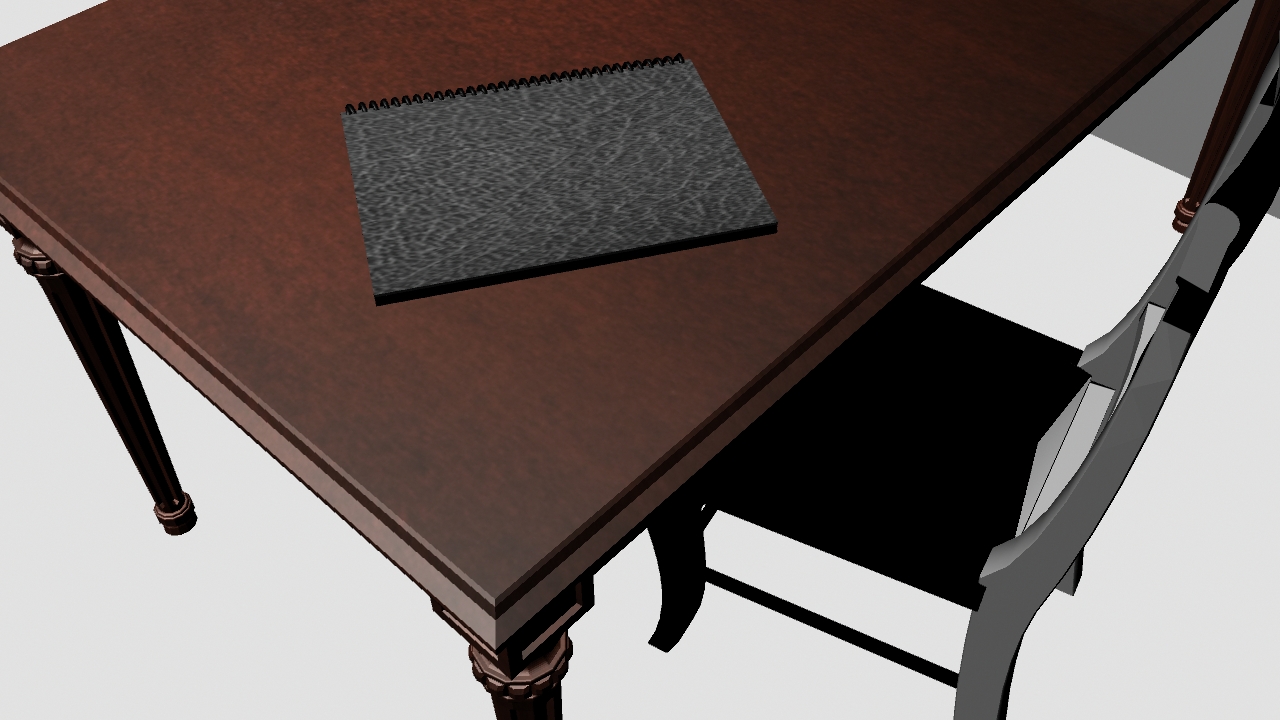
Book Texturing:


Texturing Books in Mari + Tracking - Valentino


Was not sure if I wanted to apply text to the book, realised it was better to leave the page empty as I wanted flying text coming out the book as in the next diagram:


Shader network for texturing book test

Postion of camera where book will be positioned

Textured Book without text

Textured Book with old English writing
Crosses texture for tracking applied to pages
Door Texturing: (Texture Not Used Due to the colour not matching the environment)


Door Knob UV
Chair Texturing:


For the floor I am using Substance nodes to create realistic editable floor textures - Valentino


14/03/12
Evidence of NETWORK WORKFLOW - Consistent TRANSF
ER OF FILES from team mates
ER OF FILES from team mates


INDUSTRY CONTACT:
- THE FOUNDRY
Student Stars Vimeo Channel
With our award-winning tools at your fingertips we're really excited to see where your creativity takes you.
Send us your favourite work to studentstars@thefoundry.co.uk and if we like it we'll post it to our Student Stars Vimeo Channel. Either send us a Vimeo link or a download link. Don't forget to include:
- Your name
- Your university or college
- What software you used
- A short description of your work.
15/03/12
Professional Skills
1. Identify your film/projects market
- Science / Medical / Festivals / National Geography / Discovery Channel
- Sell it to directors and producers. The foundry post production houses - framestore, Mpc, Double negative, ILM, Ingenuity
2. Structure your individual (Group?) website marketing on-line presence
Link to website website:
Facebook Promotion:

Specialism Texturing:
3. Identify an employer/company who you will invite to the degree show.
Recruitment manager / Technical Director / Production Manager
Contacted the foundry to invite them and information on promoting student films using their products as stated on their website:
Kamilia - Secretary:
emailed:

marketing@thefoundry.co.uk
4. Evidence of how other animators /creative have marketed their products.
2004 film, Ryan.
Awards For Ryan -
POTENTIAL FESTIVALS FOR SYNAESTHESIA:
Encounters Animation Festival
Bristol Festival
Encounters Animation Festival
Bristol Festival
Cork Film Festival
Cork - Ireland
International Short Film Festival of Drama
Athens - Greece
International Fantastic Film Festival (PIFAN)
Puchon - Korea
International Animation Festival
Melbourne - Australia
IFP Los Angeles Film Festival
Beverly Hills - USA
Film Festival
Sydney - Australia
Newport International Film Festival
Newport - USA
Mountain Film Festival
Telluride - USA
Animation Festival International
Kalamazoo - USA
Animation Festival International
Kalamazoo - USA
WorldFest - International Film Festival
Houston - USA
Delaware Valley Arts Alliance
Narrowsburg - USA
Golden Gate Awards Competition & International Film Festival
San Francisco - USA
Belgrade Documentary and Short Film Festival
Belgrade - Serbia
Florida Film Festival
Maitland - USA
Aspen FilmFest (Shortfest)
Aspen - USA
Genie Awards
Toronto - Canada
International Film Festival
Cleveland - USA
International Film Festival
Tampere - Finland
Cinequest
March 2 to 13 2005, San Jose - USA
Reel to Real International Film Festival for Youth and Families
Vancouver - Canada
Annual Academy Awards / OSCARS
Hollywood - USA
Film Festival
Victoria - Canada
Black Maria Film and Video Festival
Jersey City - USA
Sundance Film Festival
Park City - USA
Future Film Festival
Bologne - Italy
Toronto Film Critics Association Awards
Toronto - Canada
Canada's Top 10 - International Film Festival Group
oronto - Canada
Animadrid
Madrid - Spain
International Festival of Documentary and Short Film - (Zinebi)
Bilbao - Spain
Golden Horse International Film Festival
Taipei - Taiwan
Cape Town World Cinema Festival
Cape Town - South-Africa
International Film and Video Festival
Columbus - USA
International Animated Film Festival / CINANIMA
Espinho - Portugal
International Animated Film Festival / CINANIMA
Espinho - Portugal
AFI International Film Festival
Los Angeles - USA
Holland Animation Film Festival
Utrecht - Netherlands
Holland Animation Film Festival
Utrecht - Netherlands
ION International Short Film, Animation & Games Festival
Los Angeles - USA
International Film Festival
Leeds - England
ArtFutura
October 28 to 31 2004, Barcelona - Spain
International Film Festival
Valladolid - Spain
International Festival for Documentary and Animated Film
Leipzig - Germany
International Short Film Festival
Uppsala - Sweden
The Festival du Nouveau Cinéma Montréal
Montréal - Canada
Woodstock Film Festival
New York - USA
Imago Film Festival
Fundao - Portugal
International Animation Festival
Ottawa - Canada
Atlantic Film Festival
Halifax - Canada
LA Shorts Fest
Los Angeles - USA
Prix ARS Electronica
Linz - Austria
International Short Film Festival
APalm Springs - USA
International Animation Festival
Hiroshima - Japan
SIGGRAPH
Los Angeles - USA
International Animated Film Festival
Annecy - France
International Film Festival
Cannes - France
Worldwide Short Film Festival
Toronto - Canada
5. Individual scheduling - weekly meetings etc. - (Google calendar)


6. Individual marketing plan for the degree show
Invite industry
Business cards
Flyers - Galleries around london

Posters
Facebook group
Send to festivals
8. A short personal reflective account of how you have responded to this unit:
This Unit has been a exciting journey throughout our pre, post and production stages of the Synaesthesia. The requirements for this unit has catapulted the film process.
This Unit has inspired myself to researching into my specialist are which I have no decided to be Texturing.
Although texturing is known to be through UV opening and photoshop painting, Mari from the foundry has opened up a new dimension in texturing, giving the artist less technical problems to deal with.
The challenges were many, but the outcome of the 2 final rendered shots felt as though we had won a award for the best animation festival. Now that I have identified the films workflow, and rendering problem, steps can be taken to avoid future conflict such as rendering time and to use the correct render packages.
The Marketing of the film is important to the promotion of Synaesthesia, by inviting related specialisms from the industry gives the team members the chance to network industry professionals, even possible employers.
This unit seems to be carefully constructed as is guides final year students into knowledge of workflow and area specialism.
9. Evidence of Networking between team mates:


10. Individual Contract:


30/03/12
Poster Design

31/03/12
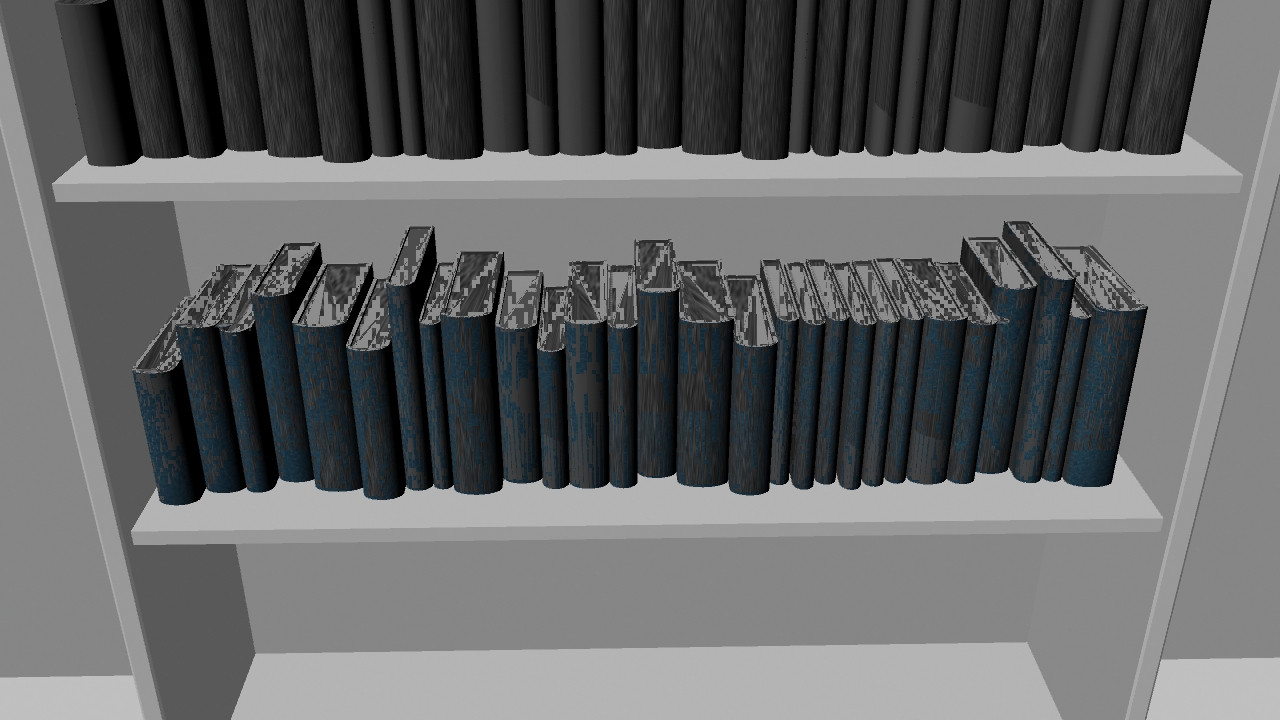
Prop Model - Perri Wheeler
Texturing - Valentino
Shelve Design by Perri Wheeler: (Later this design was not used but replaced by a more simple design to accomidate the environment)


UV Adjusting


Uvs were a bit funny to work out, but eventually I didnt have to change anything from the original UVs Perri supplied me with. As I thought auto Uv unwrapping would work, the normal Uvs worked perfectly.
12/04/12
Production Checklist - Valentino
1 Month Left For Synaesthesia Deadline!
Things left to do:
-Alexandra Animation Walking, sitting down and Fingers
-Dynamics of Piano, Painting, Dog Shot
-Colours flowing into the eye (Post)
-Dog Animation of head and sad Face
-Hair for Dog and Main Character - Dynamic
-Render all shots
-Compositing
Camera angles solidified - See Production Link
Other Synaesthesia TED talks:
http://www.ted.com/conversations/9422/synaesthesia_allows_us_to_unde.html
Texturing - Valentino
Hand References


Hand texture with only base colour 


Patches in Mari (AKA UV blocks)


Uv Layout of hands
 Base colour, nails and wrinkles all on seperate layers for ability to edit in post


Hand Rendered in Mental ray (Complete)
-Valentino
03/05/12
Creating hair in Photoshop & Mari - Valentino

Hair brush used in Photoshop to clean up Hair created in Mari using the same brush.


Eye brows created with brush

Hair Base Colour c

04/05/12
Camera Animation - Valentino
Process:
Animating the camera -Valentino
Camera Animation -Valentino
Outcome:
1st shot camera Animation - Steps (Walking) -Valentino
3rd Shot Camera Animation - Dog Scene -Valentino
Shot 7 - Character animation clean up keyframes and movements for Painting Scene -Valentino
05/05/12
Feedback for animation Shot 3 - James Waters
Book Shot Needs some touch ups:
1. Over the shoulder shot:
- Character is too stiff, the hands should move slightly aswell
- Head slightly moving from left to right slightly giving the impression of reading
- When the P.O.V angle is shown, the books should move slightly up and down, barely noticeable to give the impression of her actually holding the book.
- When the book is put down her left thumb passes right through the page
- The left hand slips whilst she is putting the book down.
Thanks for all the good work!
Valentino
06/05/12
Lighting Passes to render - Arpit Achha
For Arpit the lighting artist, heres a link underlining the relevant passes- Reference:
I used a lot of renderpasses for this project. It gave me much control and was very fun to work with. Everything was comped in fusion. You can use render layers to get the passes you want.

A. Diffuse pass. Rendered with Lambert material and only the directional light active
B. Indirect pass. Rendered with Lambert material and Hdri + Final gather
C. SSS back pass. SSS shader broken into pieces. This showing only the bottom layer.
D. SSS subdermal pass. Middle layer of the SSS shader.
E. SSS epidermal pass. Final SSS layer. This layer is on top of the other SSS layers.
F. Color pass. Only flat color. You can achieve this by using a surface shader.
G. Specular pass.
H. Reflection pass. Use in combination with the facing ratio pass (I) to get nice subtle reflections
I. Facing ratio pass. Highlights everything on your model that’s facing away from the camera. Can be used in combination with several other passes.
J. AO pass. Ambient occlusion to get shadow in difficult places. And more contact against the ground.
K. ID pass. In combination with other passes you can key out the color you want to work with.
L. Depth pass. Based on the luminance of the image you can fake a DOF effect in post.
M. Normal pass. A very cool pass that can be used to relight your model in post.
A link explaining GAMMA CORRECTION
http://www.cgsd.com/papers/gamma_intro.html
Forum:
http://forums.cgsociety.org/showthread.php?f=2&t=610790&page=1&pp=15
A new Poster For our Film is on its way...
07/05/12
Compositing Render passes -Valentino
I have been trying to comp our rendered layers together, but it seems that we ran through a few problems.
1. Renders that were on overlapping layers did not match well
eg. Hands going through books etc.
2. I was not sure which render passes to render in Maya.

Solution:
Render character and canvas on separate layers:
3. Layering was a problem. I was not sure what layers we needed to render.


Diffuse Pass

Beauty pass

Direct no shadow pass

Diffuse Pass with alpha
Solved by:Rendered passes:
AO
Beauty(Later removed due to this pass not needed)
Diffuse(Later removed due to this pass not needed)
Shadow(Later removed due to this pass not needed)
Specular(Later removed on a few shots due to this pass not needed)
Master Beauty(Always rendered)
Average render time per frame: 3-7minutes depending on scene


Test Beauty Render with lighting

Good rendered using render passes

Render pass settings-setting up the passes
This is a good link that helped me understand Rendering and passes:
08/05/12
Tracking in MatchMover - Valentino


Failed Tracking - Transferred Camera Data into Maya from MatchMover
09/05/12
Final Shot Descriptions - Valentino
SCENE 1 - SHOT 1 - INTRO - HOUSE -LIVE ACTION/3D
SCENE 2 - SHOT 2 - HALLWAY TO KITCHEN 3D
SCENE 3 - SHOT 3 - ESTABLISHING SHOT BOOK ROOM
- SHOT 4 - OVER THE SHOULDER SHOT BOOK
- SHOT 5 - P.O.V BOOK
SCENE 4 - SHOT 6 - OVER THE SHOULDER DOG ROOM
- SHOT 7 - P.O.V
- SHOT 8 - FACE
- SHOT 9 - STANDS UP
- SHOT 10 - LEAVES ROOM
SCENE 5 - SHOT 11 - ESTABLISHING PIANO SHOT
- SHOT 12 - P.O.V PIANO KEYS
- SHOT 13 - PIANO FADE
SCENE 6 - SHOT 14 - PAINTING ROOM
SCENE 7 - SHOT 15 - HALLWAY ROOM
SCENE 8 - SHOT 16 - SYNAESTHESIA FACTS
CREDITS
Rigid bodies ~ Dynamics - Valentino
10/09/12
Simple Tutorial I created by:
Bevel Text and Applying Rigid body effects in Maya - Valentino
Flying Letters:
Developed a diagram on how to create ''Flying text'' coming out the pages of a book in Maya - Designed by Valentino
For the book scene I constructed this to get around creating flying text using rigid bodies(Theory):

The problems I encounted constructing this device:
When I create the cylinder, the rigid text get stuck onto it, I expected the text to bounce off the cylinder, but unfortunately they would stick to the geometry or go right through.
The result of the diagram ended up being simpler than expected!
All that was needed was a plane, designed letters from extruded primitive text with a active rigid body effect applied. Keyframing was also important to activate the bodies ''Active keyframe'' and ''Passive keyframes''.
11/05/12
Renders are almost complete! Blending live action with 3D-Animation was a challenge
Here is a test snapshot for the intro scene, the lighting is complete, now the compositing will be the next step!

12/05/12
Cleaning up Animation - Valentino
13/05/12
Some changes needed for Animatic 8
(Animatics wont be uploaded due to the film almost complete) - Valentino
Title in the sky with grundgy backround
Shot 1 - Composite Alex with Live action recording of sky
O:\SynFINALRENDERS\1stShotRenders
(Needs Stabilization)
-Create Shadows in after effects
-Fix timing and shake of character
-Track in after effects cs6
-Get rid of sky track?
Shot 2 - Hallway Shot
- Re Render Backround of kitchen room (use depth of field to blur background
- Need Kettle Smoke From Amelie - Send Hallway scene with proper camera
- Fix fire so it does not over lap
- Alex Is Missing
Shot 3 - Reading Room
-Replace With proper
Shot 4 - Dog Room
Fran Missing
- Where she leaves the room
- Scale Alex
Shot 5 - Piano
Shot 6 - Painting
Particles not sitting well cause of render?
Replace Alex and Painting with correct version
Shot 7 - Hallway
Depth of field not working
Make 10 DVD's
Include making of?Special Features?Menu?
14/05/12
Design - Poster and DVD

+

=

Dvd Template Design - Valentino

15/05/12
Intro Shot Bird Sound Test Design and animation- Valentino


Train Effect for intro shot - Model and animation - Valentino
16/05/12
Design Poster 2:

23/05/12
Cleaning up Errors, rendering + re-rendering.
Color Grading - Yamen Albadin
Color grading Synaesthesia so the look and feel matches the storyline, the broadcast safety was essential to correct Chroma and Luma for broadcast quality footage.
Here are some snapshots of the before and After Broadcast Safety:


26/05/12
Film Completed.
Hand-In Checklist:
Portfolio of final animation work in a single compiled DVD (as agreed in the Individual Learning Contract);
* Final Group piece movie CHECK
Three folders;
* Animation CHECK
* Artist CHECK
* Technical CHECK
* A critical commentary (4000 words maximum); CHECK
An on line journal or production log including selected documents CHECK
(such as the Individual Learning Contract, CHECK
sketches, CHECK
preliminary drawings, CHECK
background research, CHECK
development/unused visual material etc) that will, with the compilation animation itself, provide an evidence base for your individual contribution within the group project
(Please copy the address to your blog clearly on the submission.) CHECK
28/05/12
DEADLINE
HAND-IN SYNAESTHESIA
4PM
Student Film Completed.
Continuing blog - Further progress of Synaesthesia- Marketing and promotion:
I plan to send Synaesthesia to festivals in Cyprus and Greece, because the first language is Greek, subtitles will be created for the film.Continuing blog - Further progress of Synaesthesia- Marketing and promotion:
Here is a good link for placing subtitles onto a film:
http://www.makeuseof.com/tag/how-to-add-subtitles-to-a-movie-or-television-series/
The subtitles that I translated into Greek were just sent to a friend of mine in Cyprus to look over and correct before finalized.